

Drawing Basketball: A Step-by-Step Guide. Learn To draw basketball with our easy stepbystep guide! Perfect for beginners. It breaks down The process in simple terms. Grab your pencil & start today!
What is Drawing Basketball: A Step-by-Step Guide & how does it work?
Drawing basketball involves illustrating basketball players. Scenes, & actions. This unique art form captures athleticism. Movement, & emotion. Artists use various styles. From realistic To abstract. Creating dynamic representations. Understanding proportion. Movement, & perspective enhances drawings. Familiarity with basketball fundamentals aids in depicting accurate posture & gestures.
Brief history of Drawing Basketball: A Step-by-Step Guide
Basketball art dates back To early 20th century. Artists sought ways To celebrate athletic achievements. Comics & posters popularized illustrations of players. Over years. Many styles emerged. Reflecting cultural shifts & artistic innovations. Street art also contributed greatly. Bringing basketball into urban landscapes.
How To implement Drawing Basketball: A Step-by-Step Guide effectively
Start with basic shapes for body outlines. Use circles for heads. Ovals for limbs. Next. Focus on proportions & angles. Observe real players during games for inspiration. Sketch dynamic poses. Capturing action & energy. Refine details by emphasizing facial expressions & uniforms. Finally. Add background elements for context.
Key benefits of using Drawing Basketball: A Step-by-Step Guide
Creating art improves observation skills. Artists develop a deeper appreciation for movement. Basketball illustrations promote a sense of community among fans. Visual storytelling enhances emotional connection with sport. Furthermore. Showcasing creativity helps build an artist’s portfolio. Art also serves as a tool for education. Explaining plays visually.
Challenges with Drawing Basketball: A Step-by-Step Guide & potential solutions
Difficulty in capturing movement often occurs. Observing live games aids in understanding dynamics. Limited resources may hinder skills development. Online tutorials & workshops offer valuable insights. Some artists struggle with proportions. Practicing regularly can lead To significant improvements. Feedback from peers also helps refine techniques.
Future of Drawing Basketball: A Step-by-Step Guide
Technological advancements will shape basketball illustrations. Augmented reality could enhance viewer experiences. Social media platforms will continue showcasing emerging artists. Collaborations between athletes & artists may increase visibility. Trends like digital art are capturing wider audiences. Artistic expression will evolve as basketball culture grows worldwide.
Table of Drawing Basketball: A Step-by-Step Guide
| Step | Action | Tips |
|---|---|---|
| 1 | Outline basic shapes | Use circles. Ovals |
| 2 | Focus on proportions | Study real players |
| 3 | Sketch dynamic poses | Capture energy |
| 4 | Refine details | Add expressions. Uniforms |
| 5 | Add background elements | Provide context |

Step 1: Gather Your Materials
Before starting. Collect essential materials. A sketch pad. Pencils. Erasers, & colored markers are perfect for this project. Ensure your workspace has good lighting. You want a comfortable position while sketching.
An alternative could be using digital tools. Like a tablet. Both options allow flexibility in style & technique. Explore various platforms that provide drawing applications. Tools like Procreate or Adobe Fresco can enhance creativity.
Lastly. Having references helps improve your basketball drawing skills. Skim through images or videos that show basketball players in action. Engaging with resources like tutorial videos can provide inspiration & guidance.
Step 2: Observe Basketball Anatomy
Understanding basketball anatomy provides essential insights. Observe proportions & body movements unique To this sport. Examine various positions. Such as dribbling or shooting. Focus on how limbs move during these actions.
Sketching different players aids in grasping body dynamics. Each player’s style offers an opportunity for exploration. Their distinctive moves allow an artist’s interpretation from various angles.
Many resources emphasize observing athletes in motion. Explore articles & visuals that highlight movement. This can be invaluable for aspiring artists aiming for realism. Familiarize yourself with diverse basketball techniques & styles.
Step 3: Basic Shapes & Guidelines
Use simple shapes when starting a drawing. Circles for heads. Ovals for bodies, & lines for limbs establish a solid foundation. These shapes help maintain proportion & balance throughout your sketches.
After forming basic shapes. Sketch light guidelines. This will make adjustments easier as you proceed. Crosscheck positions of joints. Such as elbows & knees. Accurate placement prevents disproportionate figures.
Don’t hesitate To erase & modify as needed. Flexibility during this stage leads To better results. Mastery of shapes enhances overall drawing techniques & performance.
Step 4: Defining Contours & Features
Now it’s time To add contour lines. Focus on defining head. Torso, & legs’ outlines. Ensure your lines flow naturally. Reflecting movement. Capture energy present in basketball through expressive strokes.
Facial features add personality. Use gentle curves for a mouth & subtle angles for eyes. These small details enhance character within your drawing. Attention paid here can elevate overall quality significantly.
Gradually remove excess lines once contours are established. Refine The outlines until satisfaction is achieved. This process will prepare your drawing for shading & coloring later.
Step 5: Shading Techniques
Shading gives depth. Portraying threedimensionality. Use various pencil pressures To create shadows. Darker areas represent shadows. While lighter regions signify reflections. Experiment with techniques like crosshatching & stippling.
Observe how light affects players’ movements. Each muscle & contour responds differently based on light source. Recognize where shadows naturally fall during gameplay for realistic effects.
Integrate colors when confident with shading. Colored markers or pencils can enhance visual appeal. Consider creating color gradients. Enhancing realism in your drawings.
Step 6: Coloring Your Drawing
Select a color scheme that reflects basketball themes. Team colors or classic orange basketballs work effectively. Approach coloring carefully. Ensuring blending & transitions appear smooth.
Experimenting with layers may produce stunning results. Color over previously shaded areas softly. Providing highlights. These strategic variations can significantly impact visual clarity.
While coloring. Allow certain elements To appear vibrant. Strive for a balance between bold & understated features. This contrast contributes greatly To artistic expression.
Step 7: Adding Action Elements
Incorporating action adds excitement. Show movement through lines & shapes around players. Employ motion lines that capture energy & dynamics effectively.
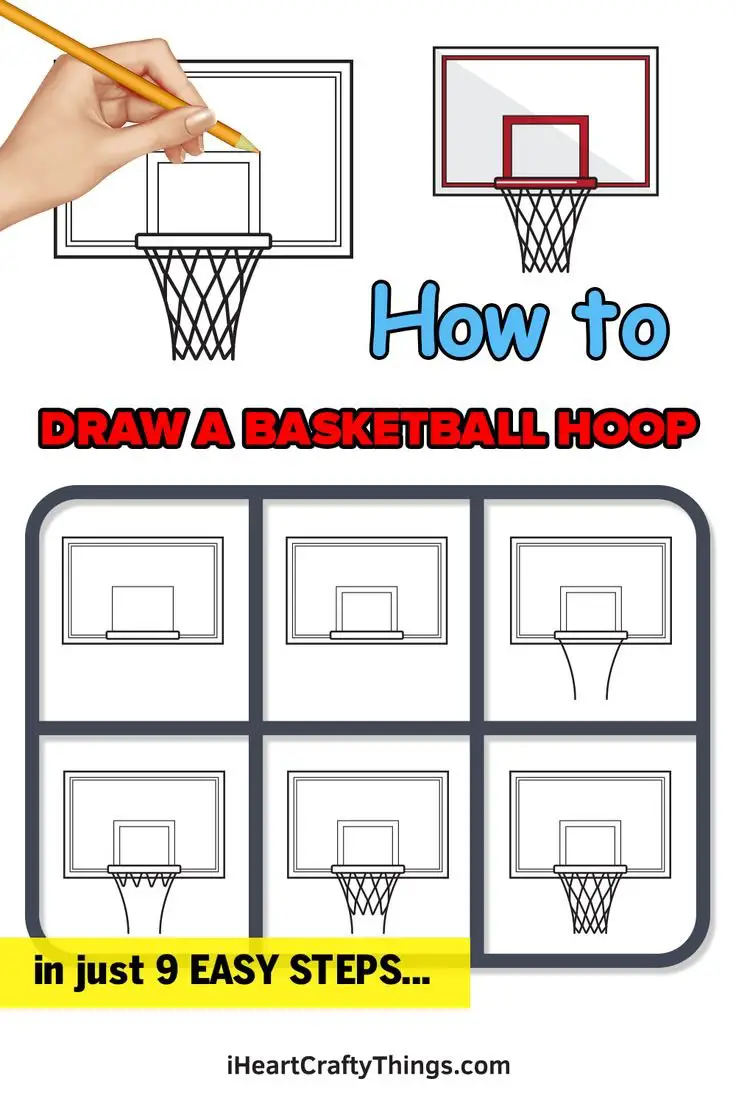
Consider adding basketball elements. Such as a hoop or ball. Position these elements strategically within your composition. This creates a complete & engaging drawing.
Utilizing perspective can enhance realism. Illustrate depth by adjusting sizes based on distance. Players closer should appear larger than those further away.
Step 8: Experimenting with Styles
Explore various artistic styles for your basketball drawing. From comic styles featuring exaggerated features To realistic portrayals. Each style enhances creativity. Every choice reflects individual artistic expression.
Attempt mixing different techniques. Combine realism with abstract elements. Freeing your imagination. Such experimentation allows for growth in artistic abilities.
Visit online galleries for inspiration. Many artists showcase diverse styles & techniques. This exposure can inspire unique adaptations within your basketball drawings.
Step 9: Seeking Feedback
Feedback plays a crucial role in growth. Share your drawings with friends or artistic communities. Online platforms provide excellent venues for critique & support.
Encouragement & constructive feedback enhance confidence. Engage with fellow artists & learn from their experiences. Incorporating suggestions may refine your skills further.
Always remain openminded regarding opinions. Each piece of input contributes toward development. Artistic journeys thrive on collaboration & shared knowledge.
Step 10: Creating a Portfolio
A portfolio showcases your best work. Select pieces that highlight diversity & your unique style. Consider including various subjects. From independent players To team dynamics.
Organizing work enhances presentation. Create sections based on themes. Techniques. Or styles. This clarity appeals greatly during reviews & exhibitions.
Consider digitizing artwork for wider reach. Online portfolios can attract opportunities & followers. Enhanced visibility builds connections within The artistic community.
Step 11: Participating in Challenges
Art challenges inspire creativity. Join community events or online contests. These encourage commitment. Allowing growth through focused practice.
Challenges often present themes or stipulations. Engaging with such prompts fuels creativity. Adapting your style introduces new techniques not previously explored.
Celebrate accomplishments. Regardless of competition outcomes. Personal growth achieved through participation surpasses mere victories.
Step 12: Learning from Professional Artists
Study professional artists actively. Analyze their techniques. Styles, & approaches. Understanding their processes offers valuable insights into mastering your craft.
Watch tutorial videos or read interviews about their experiences. Many established artists share knowledge openly. Providing inspiration. Utilize these resources generously.
Attend live workshops or exhibitions. Direct interaction with professionals can lead To mentorship opportunities. Such experiences often prove pivotal in advancing artistic careers.
Step 13: Exploring Basketball History
Understanding basketball’s history deepens appreciation. Historical knowledge influences artistic interpretations. Many iconic players symbolize different eras. Adding depth To your work.
Incorporate historical elements into drawings. Like retro uniforms. This detail can evoke nostalgia. Enhancing interest in your work. Historical context provides depth. Inviting viewers into a richer narrative.
Research various impacts basketball has had on culture. This awareness enriches both artistic expression & viewer connection. Engaging with this backdrop fosters a greater appreciation for The sport’s significance.
Step 14: Hosting Art Exhibitions
Exhibitions allow showcasing work publicly. Organize local gatherings or join community art events. These occasions create opportunities for networking & visibility.
Consider displaying basketballthemed pieces. This unique niche can attract specific audiences interested in sports interpretation. Collaborative efforts with local schools may yield fruitful partnerships.
Preparation & promotion are key. Utilize social media for outreach. Connecting online can drive attendance & encourage community involvement.
Step 15: Continuous Practice & Patience
Developing skills requires dedication & time. Consistent practice builds familiarity with techniques & techniques. Engage in daily or weekly sessions To nurture improvement steadily.
Patience cannot be overstated. Every artist faces challenges. Embrace setbacks as learning opportunities. Enhancing resilience.
Reflect on progress over time. Recognizing growth strengthens commitment. Stay curious. Open To new experiences, & let passion guide your journey.
- 🖌️ Basic materials for sketching
- 🎨 Understanding basketball anatomy
- 📏 Importance of line work
- 🖍️ Diverse coloring techniques
- 🏀 Action elements integration
- 🎉 Seeking feedback from peers
- 📚 Learning from professionals
Throughout my drawing journey. I’ve learned so much. Initially. My basketball sketches felt lifeless. Gradually. With practice. I developed confidence & unique style. Engaging with fellow artists fueled my passion further. Their encouragement helped refine my techniques wonderfully.

Understanding Basic Elements of Basketball Drawing
Basketball involves dynamic movement. Swift action, & a unique sense of style. Capturing these elements through drawing demands careful observation. Begin by focusing on The posture of players. Lines & shapes create a sense of motion. Developing a keen eye for proportions aids representation. Start by sketching simple stick figures. Gradually add details. Enhancing structure & depth.
Consider spending time studying player movements. Watch games or practice sessions. Observe how athletes position themselves. Take notes on their stances. Every gesture communicates emotion & intent. Each body part plays a significant role in conveying action. Discovering these nuances through sketches elevates artistic skills. Use quick gestures when practicing. This technique builds muscle memory for depicting movement.
Additionally. Practice different perspectives. Vary angles & compositions. Aerial views showcase court layouts. Side perspectives allow focus on player interactions. Varying The viewpoint enhances creativity. This experimentation opens doors for fresh designs. Brooklynbased artist Evan Hecox offers excellent insights around dynamic basketball imagery. His work inspires budding artists. For practical visual inspiration. Check out this informative video. It demonstrates essential techniques in action.
Materials Needed for Drawing Basketball
Gathering materials helps streamline your artistic process. Essential tools include sketch paper & graphite pencils. An eraser is also crucial for refining details. Consider investing in colored pencils or markers. Too. These provide additional dimensions for your artwork.
Markers work well for bold outlines. Meanwhile. Colored pencils add depth & texture. Acquire a variety of brush sizes if opting for paint. This versatility enriches The artistic toolkit.
Furthermore. Explore digital drawing tools. Tablets & styluses open new possibilities. Many artists take advantage of software for clean designs. For inspiration. Visit this Pinterest link. You’ll discover a plethora of basketball illustrations that resonate with diverse styles. Experiment with various mediums. Allowing for personal expression.
Drawing Techniques for Basketball Action
Mastering drawing techniques plays a vital role in depicting basketball action. Start with gestures capturing dynamic motion. Simple strokes create lively impressions. Reflecting energy & excitement. Utilize short. Sweeping lines for rapid movements. This conveys a sense of urgency & speed.
Moreover. Incorporate foreshortening within your drawings. This technique displays objects receding into space. Visualizing how limbs elongate or compress enhances realism. Understanding perspective aids in achieving this effect. Experiment with exaggerated proportions for dramatic flair.
Additionally. Adding texture enriches your work. Use shading techniques. Such as crosshatching. This practice brings characters & scenes To life. Observe shadows during real games. Study how they change according To light direction. Implement these observations in your sketches. Remember. Depth creates realism.
Building Compositions in Basketball Art
Constructing effective compositions organizes your artwork. Start by determining focal points within your piece. Player positions draw attention at specific moments in gameplay. Utilize triangle formations or diagonal lines for movement. These arrangements guide viewer’s eyes throughout The composition. Ensure balance among elements. Avoiding cluttered designs.
Using negative space enhances overall clarity. Leave areas free of clutter. This helps highlight important aspects. Contrast between players & backgrounds adds depth. Utilizing colors mindfully establishes mood. Warm hues stimulate excitement; cool colors convey calmness.
Furthermore. Playing with perspective shifts creates interest. Experiment with closeups showcasing emotions. Wide shots offer an overview of gameplay. Conveying emotions through character expressions adds depth. Remember. Every detail breathes life into your drawing.
Comparing Basketball Drawing Styles
| Style | Description | Pros | Cons |
|---|---|---|---|
| Realism 🎨 | Focuses on accurate representation. | High detail. Believable form. | Timeconsuming. Demands skill. |
| Cartoonish 🖌️ | Exaggerated features. Lively forms. | Fun. Easy To express emotion. | Less realistic. May lack depth. |
| Abstract 🖼️ | Uses shapes. Colors without clear form. | Highly creative. Open interpretation. | Difficult To understand symbolically. |
| Mixed Media 🖍️ | Combines various techniques. | Unique styles. Diverse outcomes. | Complex. Requires knowledge of materials. |
| Digital 🌐 | Utilizes technology for creations. | Easy corrections. Endless possibilities. | Screen reliance can affect connection. |
Practical Tips for Improving Basketball Drawing Skills
Improving drawing skills requires consistent practice. Set aside time daily for drawing. Focus on specific aspects each day. Variety keeps sessions engaging. Try different player positions one day. On another day. Tackle court dynamics.
Additionally. Seeking feedback boosts growth. Share artwork with fellow artists or online communities. Constructive criticism helps identify areas for refinement. Engaging discussions inspire fresh ideas & perspectives.
Furthermore. Studying works from established artists fuels creativity. Analyze their techniques. What details stand out? How do they capture movement? Apply findings To your personal style. Emulate their techniques before developing your unique approach.
Reflecting on Personal Experience
During my artistic journey. I faced countless challenges. Drawing basketball players showcased my skills & areas for growth. I immersed myself in studying motions. Sketching players became an evolving process filled with learning. Every stroke helped me discover new techniques. This experience shaped my love for sports art.
What materials do I need To start drawing a basketball?
To start drawing a basketball. You’ll need some basic supplies such as pencils. Erasers. Sketch paper, & possibly colored pencils or markers for finishing touches.
How do I begin The outlines for my basketball drawing?
Start by drawing a large circle To represent The shape of The basketball. Begin with a light hand so you can easily make adjustments as needed.
What is The best way To add details To The basketball?
Add details by sketching The signature black lines that divide The basketball into sections. Make sure To follow The curvature of The ball To create a more realistic look.
How can I make my basketball look more threedimensional?
To create a threedimensional effect. Add shading & highlights. Identify a light source & shade one side of The ball while leaving The opposite side lighter for contrast.
What steps should I follow To draw a player holding a basketball?
Start by sketching The basic shapes of The player’s body. Then draw The arms & hands in a natural position holding The basketball. Focus on proportion & posture before adding details.
How can I improve The proportions in my basketball drawing?
Use reference images To understand The proportions of a basketball & a player. Measure The sizes & angles To ensure that your drawing is accurate & wellproportioned.
What techniques can help me with shading my basketball drawing?
Use techniques such as hatching. Crosshatching. Or stippling To create texture & depth. Gradually build up layers of pencil To achieve The desired darkness & effect.
Should I focus on realism or style in my basketball drawings?
This depends on your personal artistic goals. If you enjoy realism. Focus on accurately capturing details; if you prefer a stylized approach. Feel free To adapt The drawing To reflect your creativity.
What are common mistakes To avoid when drawing a basketball?
Avoid making The basketball too flat or inconsistent in shape. Take care with The lines & ensure they are smooth & evenly spaced. As this affects The overall look of The ball.
How do I make my basketball drawing pop with color?
Choose vibrant orange for The basketball & use darker shades for shadows. You can add highlights with white or light yellow To give it a shiny appearance.
Can I use digital tools To draw a basketball effectively?
Yes. Digital drawing tools can be very effective. Software like Photoshop or Procreate offers brushes & layers that can enhance your drawing process & allow for easier corrections.
What are The best practices for inking my basketball drawing?
When inking. Use finetipped pens for precise lines. Go over your pencil sketch carefully & allow The ink To dry before erasing any pencil lines To avoid smudging.
How do I add a background To my basketball drawing?
Add a simple background like a court or a hoop. Use lighter colors for The background To keep The focus on The basketball & player. Ensuring it doesn’t overpower your main subject.
What can help me develop my unique style in drawing basketball?
Practice regularly & experiment with different styles & techniques. Study other artists’ work for inspiration, & gradually incorporate elements that resonate with your artistic vision.
How can I get feedback on my basketball drawings?
Share your work on social media platforms. Art forums. Or local art groups. Constructive feedback from peers can help you improve & gain confidence in your skills.
Conclusion
In conclusion, drawing basketball can be a fun & exciting experience for everyone, whether you’re a beginner or a pro. By following this step-by-step guide, you’ve learned how To sketch players, The ball, & even The hoop with ease. Remember, practice makes perfect, so don’t be afraid To try different styles or add your creative touch. Keep honing your skills, & soon you’ll be able To capture The dynamic action of The game on paper. Enjoy The process, & most importantly, have fun bringing your love for basketball To life through your art! Happy drawing!