

Tennis Racket Drawing: How to Create Your Own. Learn how To draw your own tennis racket with our easy guide! Follow simple steps & tips To unleash your creativity & enjoy The art of drawing.
What is Tennis Racket Drawing: How To Create Your Own & how does it work?
Tennis racket drawing involves illustrating a tennis racket. This technique captures shapes. Textures, & proportions. Artists use various methods. Including sketches & digital tools. A thorough understanding enhances accuracy & creativity. Moreover. Different styles can convey unique aesthetics.
Brief history of Tennis Racket Drawing: How To Create Your Own
Early drawings focused on basic shapes. As tennis gained popularity. Artists refined their techniques. Notable illustrations emerged during 19th century. Several artists began experimenting with materials. This evolution reflects cultural influences on sport over decades.
How To implement Tennis Racket Drawing: How To Create Your Own effectively
Gather essential materials first. Such as drawing pencils & paper. Choose a reference image or an actual racket. Start with basic outlines. Focusing on proportions. Gradually add details. Like strings & grip texture. Consider shading techniques for depth & realism.
Key benefits of using Tennis Racket Drawing: How To Create Your Own
Creating tennis racket drawings boosts artistic skills. Artists enhance observation & attention To detail. Furthermore. This practice fosters creativity & imagination. It allows for better understanding of racket design & mechanics. Engaging in this activity also promotes relaxation.
Challenges with Tennis Racket Drawing: How To Create Your Own & potential solutions
Common challenges include capturing accurate proportions. Many artists struggle with detail accuracy as well. Solution lies in patience & practice. Regular sketching helps improve these skills considerably. Utilizing grid methods can aid in maintaining proportions. Too.
Future of Tennis Racket Drawing: How To Create Your Own
Emerging technologies change artistic practices continually. Digital tools offer innovative ways for racket illustrations. Virtual reality may allow for immersive drawing experiences. Artists could explore customizable designs within new mediums. Trends suggest a growing interest in art’s intersection with sports.
Table of Tennis Racket Drawing: How To Create Your Own
| Aspect | Description |
|---|---|
| Materials | Pencils. Paper. Digital tablets |
| Techniques | Sketching. Shading. Outlining |
| Benefits | Improves observation. Enhances creativity |
| Challenges | Proportion accuracy. Detail representation |
| Future | Integration with digital technologies. VR |
Tennis Racket Drawing Basics
Understanding Racket Components
Each tennis racket consists of several key components. A frame creates structure. Providing stability during swings. Strings cross over itself within a tightly woven pattern. Grips allow players proper control without slipping. All elements together define performance during play.
Specific characteristics contribute towards overall design. Racket shape affects aerodynamics. Which directly influences swing speed. Length also has implications for power generation. Choosing weight can impact maneuverability significantly. Understanding how these factors interact enhances drawing accuracy.
Consider breakdown of parts in greater detail. A hoop denotes upper; a throat connects handle. Midsection often features various technologies for improving performance. Knowledge about part functions aids representation accuracy in drawings. Artists based on this understanding can create realistic renderings.
Tools You Will Need
Gather essential tools before starting your drawing process. Preferences may vary. But basic items include pencils. Erasers, & rulers. Graph paper helps maintain proportional clarity throughout drawings. If possible. Use digital tools such as tablets or software programs for efficiency.
Markers & colored pencils can enhance visuals. Bright colors attract attention & indicate different features clearly. Software like Adobe Illustrator or CorelDRAW streamlines creation. Allowing for quick adjustments. Make choices based on personal comfort & desired outcome.
Additional items such as stencils can simplify complex shapes. Look for online resources offering templates that suit preferences. Explore links. Like this one for making your own stencils: make your own stencils.
Preparation Steps for Your Drawing
Research Different Racket Styles
Study various designs available on market. Familiarization with existing models fosters creativity during designing. Spend time examining different brands. Shapes, & colors. Identify unique traits that make certain rackets visually appealing.
Additionally. Analyze functional elements affecting playstyle. Some players prefer lightweight options. While others opt for heavier choices. Understanding these differences will aid in representing various rackets authentically.
Check forums or websites for community insights. Engaging with others passionate about tennis can uncover invaluable tips. Resources. Such as Reddit threads. Often provide unique perspectives. Consider checking this link for a fascinating discussion: Reddit discussion.
Choosing a Style for Your Drawing
Personal style plays a crucial role in expression. Select a design that resonates with personal philosophy or preferred techniques. Whether leaning towards modern. Classic. Or futuristic styles. Consistency enhances overall look.
Experimenting with different shapes invites innovation. Attempt various configurations while maintaining essential components’ functionality. Ideal designs incorporate both visual appeal & usability aspects. Reflecting attributes admired in professional rackets.
Keep in mind that diverse styles attract different audiences. A drawing might appeal more towards competitive players. While others could target casual enthusiasts. Defining target demographic influences artistic direction significantly.
Sketching Your Tennis Racket Design
Drafting Basic Shapes
Start by sketching basic outlines. Focus on proportions. Ensuring correct dimensions. Utilize a ruler for straight lines. While freehand techniques enhance organic components. Aim for balance across all elements for an appealing composition.
Consider establishing grid lines for maintaining scale. This technique promotes accuracy throughout drawing. Divide paper into sections. Aligning essential features with specified measurements. Gradually build upon foundational shapes until desired form emerges.
Incorporate slight curves along edges. Racket frames frequently feature subtle arcs that enhance aesthetics. By practicing curvature. Artists develop greater fluidity. Contributing towards more realistic representations during refining process.
Adding Details To Your Drawing
After establishing foundational shapes. Focus shifts towards intricate details. Incorporate string patterns. Grip texture, & logos from brands consistently. Precision during this phase significantly impacts realism.
Pencil options come into play here. Employ lighter strokes for initial outlines. Switching To darker shades as confidence builds. Ensure that texture representation remains consistent throughout every element. Attention at this stage sets apart mediocre works from stunning results.
Feel free also exploring shading techniques. Gradual transitions between light & dark create depth. Enhancing visual interest. Implement highlighting methods along edges. Lending a threedimensional appearance. Experimentation encourages growth. So don’t hesitate!
Enhancing Your Drawing with Color
Selecting a Color Palette
Choosing an effective color palette elevates your racket drawing significantly. Observe existing rackets for inspiration regarding popular color schemes. Make selections based on aesthetics aligned with respective brands or genre influencing choice.
Limiting colors encourages focus. Resulting in more cohesive artwork. Aim for harmony between elements. Ensuring neighboring hues complement rather than clash. Incorporate both vibrant tones & softer shades for balanced representation.
Don’t shy away from experimenting with various finishes. Matte. Gloss. Or metallic effects contribute towards overall feel. Think about which finish resonates best with intended message conveyed through artwork.
Applying Colors To Your Drawing
Begin applying colors methodically after finalizing palette selections. Use colored pencils or markers. Smoothing layers towards desired vibrancy. Gradual layering creates depth while providing options for creating subtle gradients.
Consider blending techniques for additional sophistication. Various tools. Such as blending stumps. Assist with smooth transitions between adjacent colors. Larger areas benefit from airbrush methods or spray paint alternatives. Adding flair & versatility.
It’s advised To take breaks between color application phases. Allowing time for drying or settling may prevent smudging. Revisiting projects later encourages new perspectives & could inspire unforeseen improvements.
Finalizing Your Tennis Racket Drawing
Upon completing color application. Attention returns towards detailing. Review entire drawing. Identifying areas needing extra polish or adjustment. Ensure that edges remain sharp. While colors blend harmoniously across surfaces.
Implement additional highlights wherever necessary. Bright accents along frame edges enhance depth significantly. Drawing viewer attention towards central features. Play around with methods until achieving desired visual appeal.
Finalize touchups. Stepping back frequently for perspective. In doing so. Artists gain clarity regarding overall impact achieved through efforts. Each revision propels towards richer results. Setting finished piece apart from competitors.
Showing Off Your Finished Work
With completion achieved. Consider sharing artwork with others. Digital platforms offer excellent avenues for showcasing creations. Social media accounts especially encourage engagement & feedback from fellow artists.
Seek constructive criticism. Utilizing others’ viewpoints towards improvement. Platforms like Instagram & DeviantArt specialize in visual art sharing. Fostering supportive communities. Upload images. Weave narratives around process, & connect with audiences who appreciate craftsmanship.
Another option focuses on crafting physical prints. Gallery exhibitions. Local shows. Or competitions provide excellent opportunities for exposure. Create prints based on your original artwork. Offering interested parties unique artifacts worth collecting.
Tips for Continuous Improvement in Drawing
Practicing Regularly
Commitment towards daily practice enhances skills consistently. Allocate dedicated time each day solely focused on drawing rackets. Small. Manageable sessions yield gratifying progress over time. Gradually increase difficulty as confidence builds.
Document evolution in technique through sketches. Maintaining a journal serves as an encouraging visual reminder of achievements. Review past works. Identifying patterns or styles that resonated well over time. Inspiring future iterations.
Experimentation should remain an integral part of growth. Explore creating variations between designs or influenced styles. Testing out new tools or colors encourages innovative representation. Embracing unique artistic directions.
Learning from Other Artists
Engagement with fellow artists positively impacts skill enhancement. Follow creators who resonate with personal preferences. Analyzing their techniques for inspiration. Study their unique approaches while developing original styles & expressions.
Consider taking workshops or online courses focusing on specific techniques. Many platforms offer affordable resources ranging from basics To advanced concepts. Thus. Access various knowledge levels while connecting with fellow learners.
Seek feedback regularly from peers or mentors. Constructive input allows engagement with shortcomings or strengths. Embracing honesty encourages growth while refining artistic voice over time.
Exploring Advanced Techniques
Incorporating Mixed Media
Though pencil drawing represents a fundamental skill. Mixed media offers intriguing opportunities. Combine watercolor. Ink. Or digital elements alongside traditional methods. This integration showcases versatility while broadening visual depth significantly.
Blending techniques invites exploration into innovative territory. Employ a variety of textures that challenge conventional representation. Inviting viewers into multidimensional experiences. A more dynamic approach ultimately captivates attention more effectively.
Experimenting with collaging also yields unique perspectives. Layering textures alongside drawings enriches narratives conveyed through artwork. Unpredictable combinations often result in delightful surprises. Enhancing overall artistic discourse.
Pushing Boundaries with Digital Art
With advanced technology. Digital drawing tools have evolved tremendously. Embracing these resources allows artists new avenues towards expression. Numerous programs provide exceptional features for manipulation. Color grading, & detailingwork.
Familiarize with software options. Exploring various resources available. Platforms such as Procreate or Adobe Fresco serve popular purposes throughout artistic communities. Access tutorials alongside practice sessions yields mastery of digital nuances.
Once comfortable navigating digital spaces. Venture into animation. Animated representations often breathe life into static designs. Creating dynamic visuals that draw audiences closer. Engage with software that accommodates animated effects easily.
Building a Portfolio of Your Tennis Racket Drawings
Curating Your Best Works
Consider developing an online portfolio showcasing your finest racket drawings. Select pieces exemplifying varied styles. Techniques, & skills mastered throughout artistic journey. Presenting diverse works appeals To broader audiences.
Arrange artworks thoughtfully for improved presentation. Group similar styles together or create distinct sections reflecting particular techniques. Provide context or narratives alongside visuals. Capturing viewer interest in each collection.
Regularly update portfolios as skills evolve. Incorporating newer works demonstrates growth while retaining older favorites nurtures nostalgia. Most importantly. Stay authentic in representation throughout process.
Finding Opportunities To Showcase Your Work
Participate in exhibitions or contests. Exploring local & national opportunities. Many events celebrate artistic expression encouraging community engagement. Such interactions often lead towards prospective collaborations in future projects.
Online platforms serve as additional outlets for showcasing talents. Creating profiles on artspecific websites enables connections with other artists. Collectors, & enthusiasts. Utilize social media effectively. Spreading awareness regarding personal brand.
Networking remains an essential part of building an artistic career. Attend industry events. Partake in art fairs, & join relevant groups. Resources abound. Providing valuable insights along paths toward enhancing visibility in artistic world.
Engaging with The Tennis Community
Connecting with Local Tennis Clubs
Building relationships within local tennis clubs fosters community connections. Attend events. Engage with players, & explore opportunities for collaborations. Many clubs often feature local talent within newsletters & event promotions.
Propose workshops centered around drawing tennis rackets. Such activities invite novices eager To learn new skills while establishing rapport among participants. Sharing techniques creates synergy. Benefitting everyone involved.
Volunteering at local tournaments also proves beneficial. Assisting with promotional materials provides exposure towards personal work while supporting community initiatives. This collaborative approach strengthens ties within local networks.
Contributing Art To Community Events
Offer artwork for charity auctions or fundraisers supporting tennisrelated causes. Donating pieces demonstrates good will while showcasing talents. Engaging with altruistic endeavors instills pride & enhances visibility among fellow tennis enthusiasts.
Explore opportunities leading workshops during community events. Teaching racket drawing allows sharing passions while inspiring others. Cultivating an environment fostering creativity empowers individuals benefiting from your experience.
Consider joining online forums or groups connected with tennis & art. Engaging digitally fosters deeper connections among members passionate about similar pursuits. Regular interactions provide avenues for insight. Inspiration, & potential collaborations.
Resources for Tennis Racket Drawing
Books on Drawing Techniques
Plenty of instructional books exist focusing on various drawing styles. Seek authoritative texts specializing in sports equipment or still life. Illustrative style guides provide tactics applicable across all artistic endeavors.
Getting familiar with essential drawing principles fosters foundational growth. Seek books emphasizing figure drawing for developing skills applicable beyond rackets. Application of general principles enhances versatility across multiple subjects.
Selfhelp guides focusing on color theory yield dividends. Mastery over color interactions enriches aesthetic choices across artworks. Knowledge about complementary schemes or palettes contributes toward effective artwork completion.
Online Tutorials & Courses
Numerous websites offer free or lowcost tutorials guiding newcomers through fundamental techniques. Videobased platforms. Like YouTube. Elucidate numerous styles. Offering stepbystep guidance. Utilize these resources for immediate knowledge acquisition.
Consider investing in reputable online courses centered around specific techniques. Graphically rich content assists in quickly absorbing foreign concepts. While interactive methods invite practice. Seek out instructors with backgrounds in professional art To maximize learning opportunities.
Community engagement through platforms such as Skillshare or Patreon support ongoing learning. Subscriptions provide access toward valuable insights & inspiration that inspire continuous improvement amid artistic endeavors.

Tennis Racket Drawing: Necessary Materials
Creating a tennis racket drawing requires specific materials. Make sure you have an assortment of pencils. Choose quality colored pencils or markers for better results. You might also want sketch paper or a canvas. Ensure your workspace allows for freedom & creativity.
A ruler or straightedge helps maintain precision when drawing lines. Use an eraser for mistakes To quickly correct imperfections. Further. Having reference images enriches your drawing experience. These visuals help understand shapes & proportions accurately.
Lastly. A good sharpener keeps your pencils ready without interruptions. Be prepared with all materials before starting your drawing project. Having everything on hand enhances focus & creativity. A wellprepared environment contributes greatly To your drawing’s success.
Understanding Racket Structure
A tennis racket consists of several components. It typically has a frame. Strings, & a grip. Each part plays a vital role in its function. Familiarizing yourself with these components helps in replicating them accurately.
The frame forms The racket’s outer structure. It usually has an oval shape. Varying based on style. Strings. Often made from different materials. Provide tension for hitting. They can arrange in various patterns. Affecting how power transfers from racket To ball.
Lastly. Gripping is essential for handling. Rackets have grips made from different materials. Understand each component To create an accurate drawing that showcases reallife details. These insights allow for a realistic representation of a tennis racket.
Sketching Basic Shapes
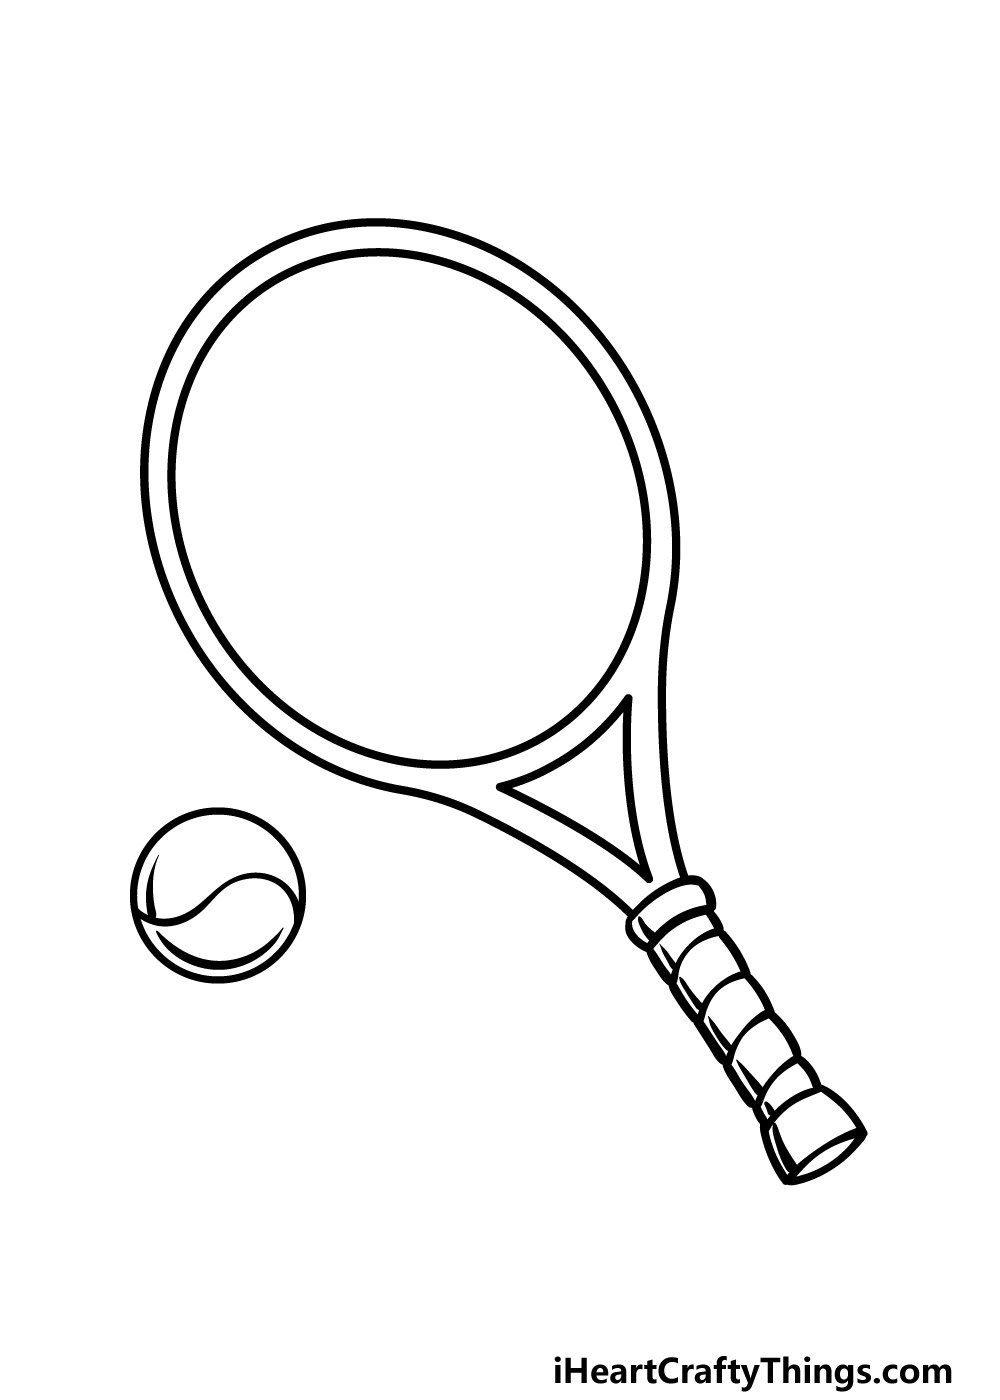
Begin with simple shapes when sketching a tennis racket. Start by outlining an oval shape for The head. This should represent The racket’s frame. Ensure you sketch lightly at first; adjustments will happen during this phase.
Next. Draw a rectangle underneath for The grip area. Give it some height. Allowing for hands of various sizes. Understanding proportions will enhance realism. Adjust dimensions based on your reference images as your sketch progresses.
Finally. Focus on string placement. Use straight lines within The head shape. This task helps establish structure early on. Experiment with different string patterns while sketching. Remember. Perfection unfolds with practice. So embrace imperfections first!
Add Details & Refine
Adding details allows your artwork To come alive. Begin by refining The outline of your racket. Make sure it reflects The shapes seen in real rackets. Pay attention To curves & angles; they define your drawing’s quality.
Next. Enhance your racket’s strings. Draw each line carefully. Maintaining consistent tension represented in your drawing. Strings usually look parallel; ensure even spacing for realism. This step requires precision. So take your time.
Then. Focus on grip details. Create texture To represent materials used in real grips. Use hatching or shading To achieve depth. Once details are added. Your drawing evolves into a more realistic representation of a tennis racket.
Choosing The Right Color
Choosing colors effectively transforms your drawing. Start with your racket’s frame color. Often a classic black or white. However. Many brands use vibrant colors for their unique designs. Select colors that reflect various styles while staying true To your reference.
Next. Add color To strings. Often. Strings are white or lightcolored. But alternatives exist. Draw attention To strings. Emphasizing their tension & layout. Blend colors carefully To blend each feature smoothly.
Don’t forget The grip. It usually matches or contrasts with frame colors. Once colors are applied. Step back. Assess coloring evenly & adjust as necessary. Proper choices enhance your drawing’s visual impact significantly.
Highlighting Shadows & Reflections
Shadows add depth & realism. Begin by analyzing your light sources. Identify where shadows naturally fall on your racket. Create soft edges for subtle transitions. Ensuring shadows stay believable.
Add reflections To enhance your drawing. Spots where light hits give a polished appearance. Use lighter shades in those areas for realism. Reflections allow your racket drawing To pop on paper.
Practice layering shades gradually. Building up from light To dark offers control during this process. Remember To use blending tools for smoother transitions. Shadows & reflections will elevate your drawing from flat To threedimensional.
Finalizing Your Drawing
Finalizing your drawing requires careful evaluation. Take a step back & review your work. Identify areas needing improvement. Make minor adjustments as necessary for balance & aesthetics.
Next. Add any final touches. Like highlights or extra details. Ensure that your racket showcases your unique style. Tweak colors for vibrancy & balance in your artwork.
Finally. Consider framing your finished drawing. Protecting your artwork preserves its beauty. You can choose digital formats or traditional frames. Celebrating your creation motivates future projects; enjoy this satisfaction.
Comparison Table of Racket Drawing Techniques
| Technique | Efficiency ⚡ | Realism 🖼️ | Time Required ⏳ | Material Used 🛠️ |
|---|---|---|---|---|
| Sketching Basic Shapes | High | Medium | Short | Pencil. Paper |
| Adding Details | Medium | High | Medium | Pencil. Eraser |
| Highlighting Shadows | Low | Very High | Long | Multiple Pencils |
| Coloring The Racket | Medium | High | Medium | Colored Pencils |
| Finalizing The Drawing | Low | High | Short | Various Tools |
My Personal Experience with Drawing a Tennis Racket
My journey began with a simple sketch. I wanted larger creativity exploration while creating my designs. Over time. I learned essential techniques through practice. Early sketches showed clear improvement as I honed my skills. Each attempt brought me closer To achieving realistic designs. Inspiration came from various sources. Including professional players & their rackets.
During one memorable session. I explored colors that greatly enhanced visuals. Experimenting led me towards unique styles. Each effort motivated me further. Fueling my passion for art. Compiling resources for reference allowed for experimentation. I found immense joy in this creative process.
Ultimately. Creating that tennis racket drawing became a rewarding endeavor. Each phase taught me invaluable lessons. Embracing challenges made me a better artist. I encourage anyone To draw their own racket; results become astonishing.
For further insights & detailed instructions. Check this link. Additionally. You can refer To this amazing resource for specific artistic techniques.
Consider browsing through all sports history for an enriched understanding. This context will further motivate your creativity. Embrace all aspects of racket drawing; every element enhances your skillset.
What materials do I need To create a tennis racket drawing?
To create a tennis racket drawing. You will need paper. Pencils. Erasers. Colored markers or crayons, & optionally. Reference images for better accuracy.
How do I start The drawing process?
Begin by sketching The basic outline of The tennis racket. Starting with The handle & The head. Use light strokes To make adjustments easier.
What are The key proportions To consider in a tennis racket drawing?
Ensure that The handle is approximately onethird The length of The entire racket. While The head should be wider than The handle. Pay attention To The elliptical shape of The head.
How can I add details To my tennis racket drawing?
Add details like The strings. The grip texture, & any brand logos or patterns. Focus on creating realistic shadows & highlights To give depth.
What techniques can enhance my drawing?
Utilize shading techniques such as hatching or crosshatching To create dimensionality. Blending colors can also enhance The visual appeal of your racket.
Should I use color in my tennis racket drawing?
Color can bring your drawing To life. So feel free To use vibrant shades for The racket frame & strings. Experiment with different color combinations based on real rackets.
How can I make my racket look more realistic?
Study real tennis rackets & incorporate their features into your drawing. Such as The curvature of The handle & The pattern of The strings. To achieve realism.
What if I make a mistake while drawing?
Don’t worry! Use an eraser To correct mistakes gently. Or incorporate them creatively into your design. Drawing is a process, & changes often lead To improvement.
Can I draw different types of tennis rackets?
Yes! Experiment with different styles. Such as advanced player rackets. Junior rackets. Or even vintage models. Each has distinct characteristics you can capture.
How do I finish my tennis racket drawing?
Once satisfied with your drawing. Consider outlining it with a finetip marker To make it stand out, & then erase any unnecessary pencil marks for a clean finish.
What can I do with my finished drawing?
You can frame it. Share it on social media. Or use it as a design for custom merchandise like Tshirts or posters. Showcasing your artistic skills.
How long does it take To create a tennis racket drawing?
The time varies based on skill level & complexity. Ranging from a quick sketch of about 30 minutes To detailed designs that take several hours.
Do I need any prior drawing skills?
No prior skills are necessary! Begin with basic shapes & gradually improve your technique. Practice is key To developing your drawing ability.
Can I use digital tools for my drawing?
Absolutely! Digital drawing software can enhance your creativity. Allowing for easy corrections. Layering, & The use of various tools To create striking designs.
Is it necessary To have a reference image while drawing?
A reference image can be very helpful. Especially for beginners. As it provides a clear guide on The proportions & details of a tennis racket.
Where can I find inspiration for my tennis racket drawing?
Look online for images of tennis rackets. Check sports magazines. Or even observe different rackets in local sports stores To gather inspiration.
Conclusion
Creating your own tennis racket drawing can be a fun & rewarding experience. By following The simple steps we’ve discussed, you can unleash your creativity & design a racket that’s truly unique. Remember To start with basic shapes, add details, & don’t be afraid To experiment with colors. Whether you’re drawing for fun or To improve your artistic skills, The key is To enjoy The process. So grab your pencils, let your imagination run wild, & create a racket that reflects your style. Happy drawing!